A
Tale
Of
Two Tube Amps
These projects started in September 2009. I had
just
finished the 6V6G stereo single ended amp pictured on the tube amp
project
page and decided to make 2 more amps that would be Christmas
presents
for
special friends and relatives. I had some VT-25 tubes and have
always
wanted
to try building a stereo amp with a class B push-pull cicuit. I know
the
purists would cringe at using elegant vintage directly heated
triodes
like
the VT-25 / 10Y tubes for a class B amp rather than a single ended
amp,
but I had 4 of the VT-25's and I love the way they light up. Also
the
push
pull output transformers can be smaller than the single ended ones
and
I laid out a design with only one transformer mounted on top of the
panel
and the rest underneath the panel, like my 6V6G stereo amp. Plus, I
already
had all the necessary iron on the shelf so I didn't have to buy any
transformers
for the project.
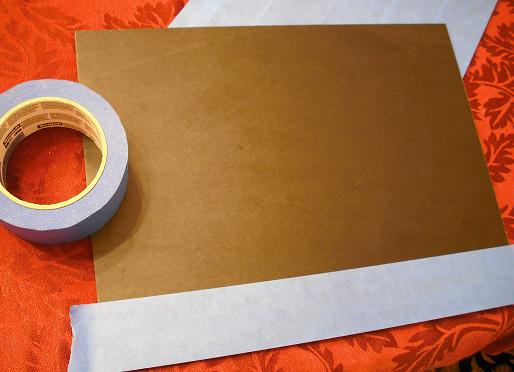
Above is the panel, made of Garolite, about 11 x 14 inches and 3/16
inch thick. I covered it with the blue masking tape for protection
and
drew the layout on the panel.
Camera broke with the photos of the panel layout, drilling the
panel,
and cutting and finishing the wood, Murphy's law in action.
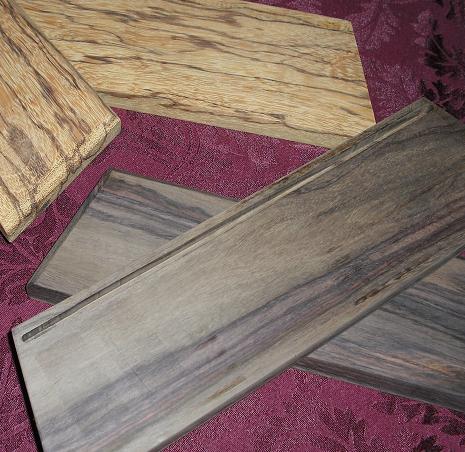
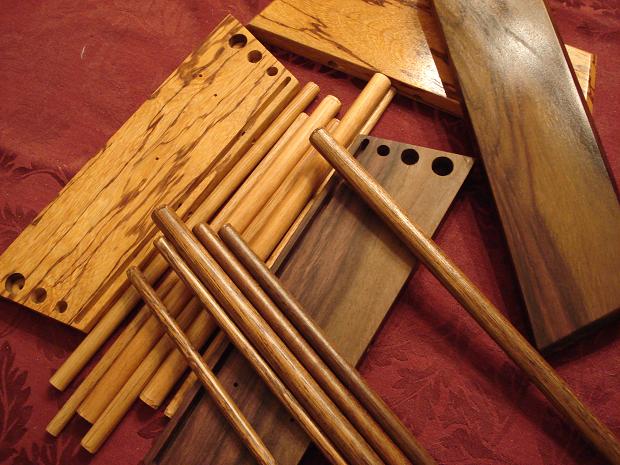
These are the end pieces for the 2 amps. The top is for the 6V6
amp
and is made of marblewood and the bottom one is made of Brazilian
rosewood.
Both are very dense but beautiful. I cut a bevel on the outside
edges
with
a 45 degree bit, and cut a groove on the inside to slip the panel
in
to.
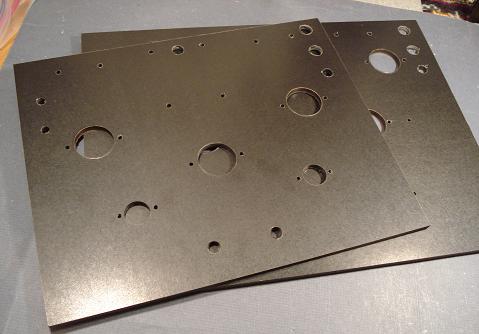
Here are the panels with the holes cut and the tape removed.
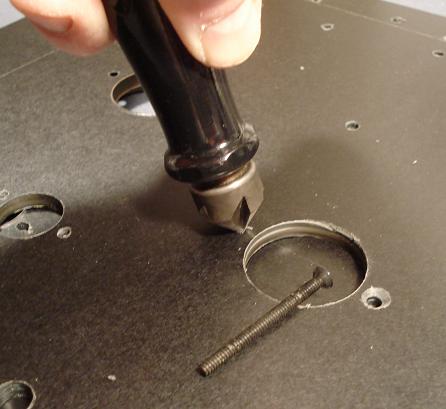
Next, I countersunk the screw holes so the screws would sit flush
with
the top of the panel. I used a hand held countersink deburring
tool so
I could control the depth of the cut.
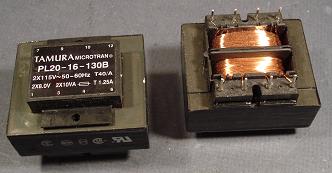
These are the transformers for the filaments for the VT-25 tubes.
They
are actually 8.0 volts center tapped, so I had to put a couple of
voltage
dropping resistors in the circuit. I used a couple of 0.2 ohm 5
watt
power
resistors for each channel. The center tap then was connected to
the
cathode
resistor and cathode bypass capacitor.
Here is what the wood end panels looked like after finishing and
drilling
the dowel holes and slots for the panel.
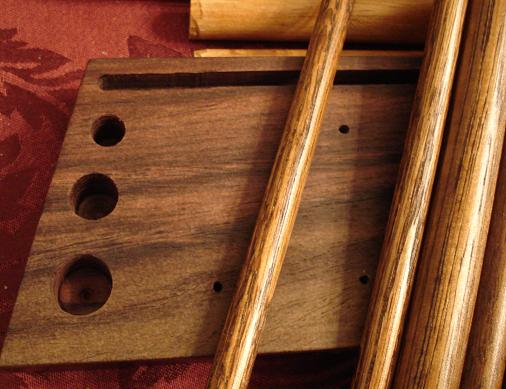
Detail of the inside face of the wood end panel.
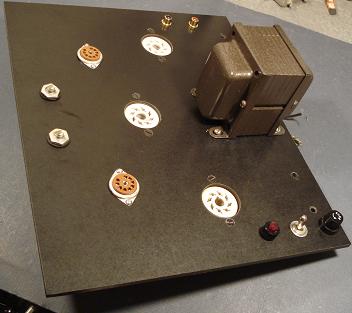
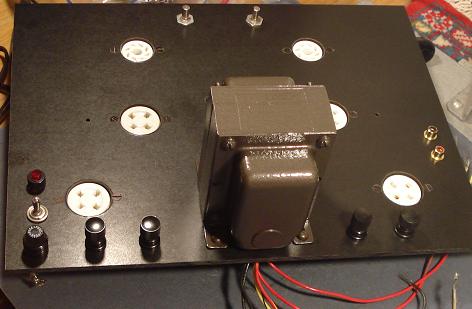
This is the top of the 6V6 five tube amp after mounting the
through
panel hardware such as the power transformer, tube sockets, power
switch,
fuse holder, RCA input jacks, pilot light, and volume
potentiometers.
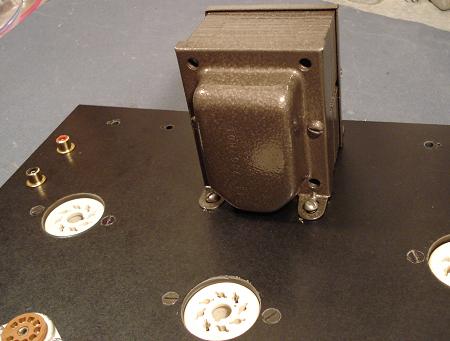
Close up of the power transformer. It was flat black and a little
rusty
before the paint job using Rustoleum hammertome finish dark bronze
paint.

Here is the top of the panel of the 5 tube amp that will use 12AU7
for preamp / driver tubes and the 6V6 for output and 5Y3G for
rectifier.
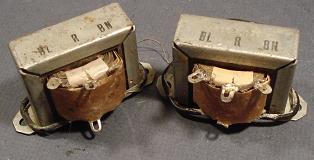
These are the output transformers for the 6V6 amp. Just as generic
pair of 8 watt vintage radio audio output transformers that are
convertible
for push-pull or single ended use, not really audiophile quality
but sound good for general use.
Just finished the 6V6 amp, Nov, 2009. Tweaked up the voltages a
little
and put on the finishing touches. Here is what the finished
product
looked
like.
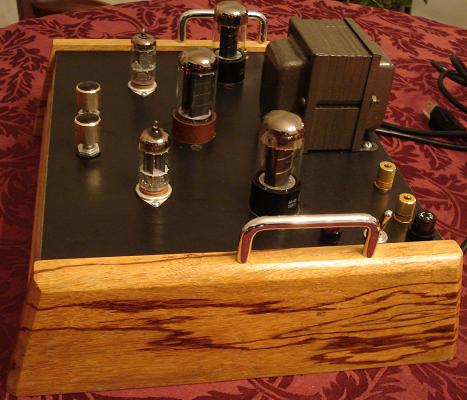
I put some nice handles on it since it was so heavy, and used gold
plated binding posts and knobs for the volume controls. The
Marblewood
looks beautiful and was a real hit with the new owner.
VT-25 Push Pull Stereo Amp

Here is the detail of the 7 tube amp using the 6SN7 drivers and
the
push pull pair of VT-25 tubes for the output, with 5U4G rectifier.
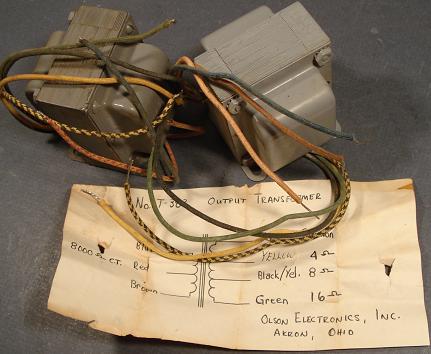
This was a pair of vintage Olson push pull audio transformers
number
T-383. They are pretty hefty and were new old stock 15 watt
transformers
that I got on Ebay a couple of years ago. I had never heard of the
company
before but I tested them on my breadboard mock up circuit and they
sounded
great so I used them instead of buying new transformers.
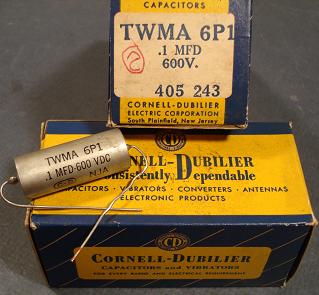
These are the signal coupling capacitors for the VT-25 tube amp. I
am planning to use interstage transformers to couple the driver to
the
output stages, and am going to try using the parallel feed
coupling so
these vintage high quality caps should do the job. I had used a
similar
pair of Seal Pups on another amp and they sounded great with no
leakage
at all.
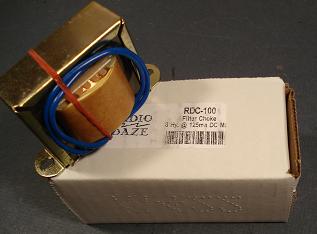
This is the 8 Hy 125 Ma filter choke for the VT-25 amp.
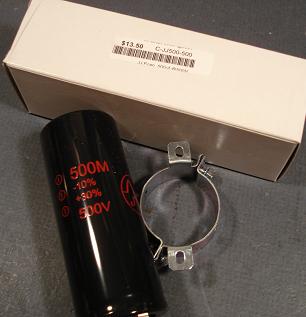
A monster 500 uf at 500 V JJ capacitor for the VT-25 amp.
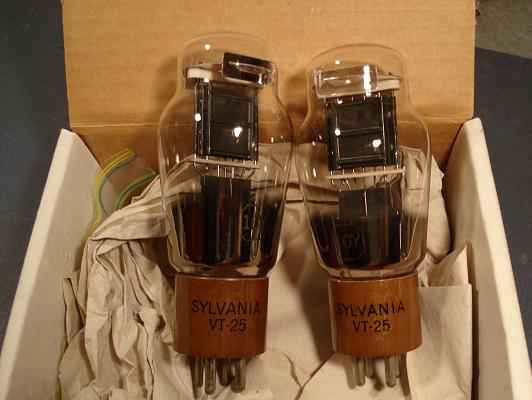
These are 2 of the VT-25 tubes I had for the amp.
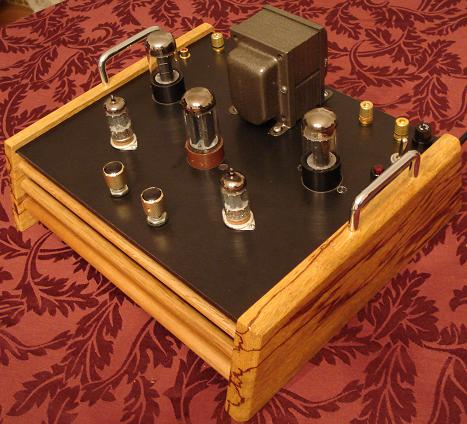
Finally got this amp done just before Christmas 2009. I made it
for
my daughter. The VT-25 tubes light up beautifully in a dimly lit
room.
The sound is quite beautiful too.
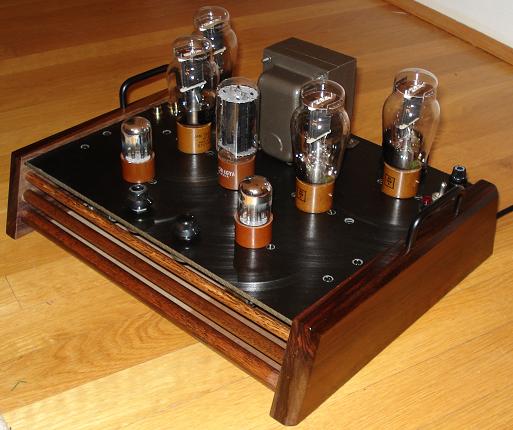
Here is the finished amp. The tubes all have brown Bakelite bases.
The symmetry was possible since the choke, audio output
transformers,
and
the filament transformers are all mounted under the chassis. I did
have
to put a few extra screws through the top panel, but I tried to
keep
the
extraneous screw holes to a minimum. There is a pegboard panel on
the
bottom
to conceal and protect the high voltage electronics, with some
spaces
between
the dowels to allow for ventilation. The South American rosewood
end
panels
were finished with about 8 coats of Deft lacquer, rubbed with 4-0
steel
wool between coats. There is no stain, just the natural dark color
of
the
wood with the beautiful grain pattern showing through.

This photo shows the VT-25 tubes with the filaments glowing. They
are
nearly as bright as a little 4 watt night light.
Back to
Scott's
Crystal Radios
Email to
scottswim@aol.com